
Red Velvet Mug Cake Recipe
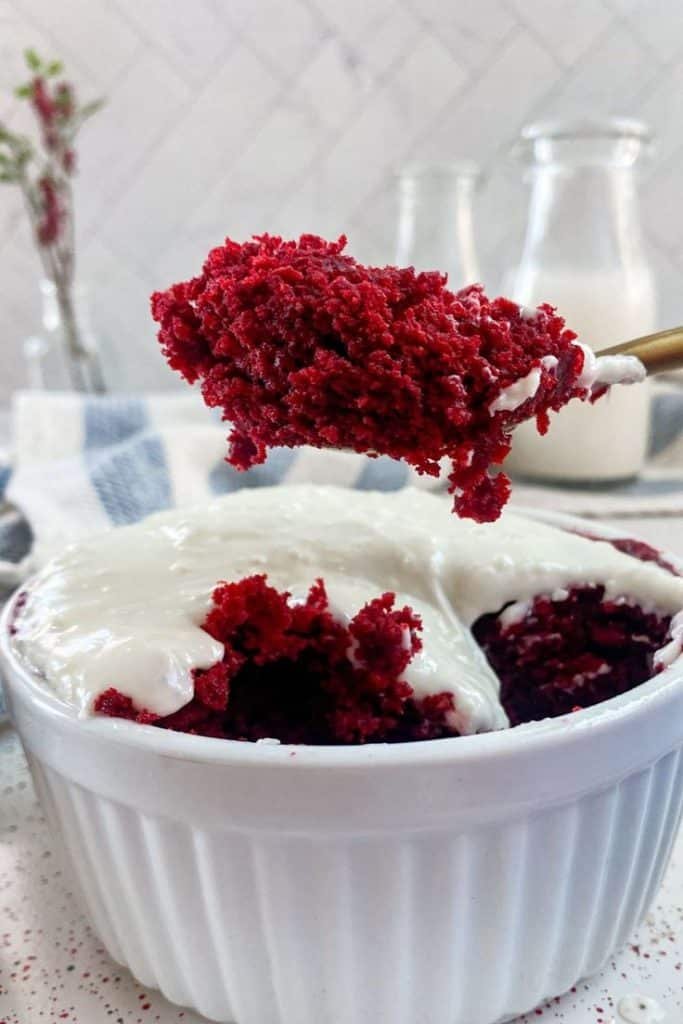
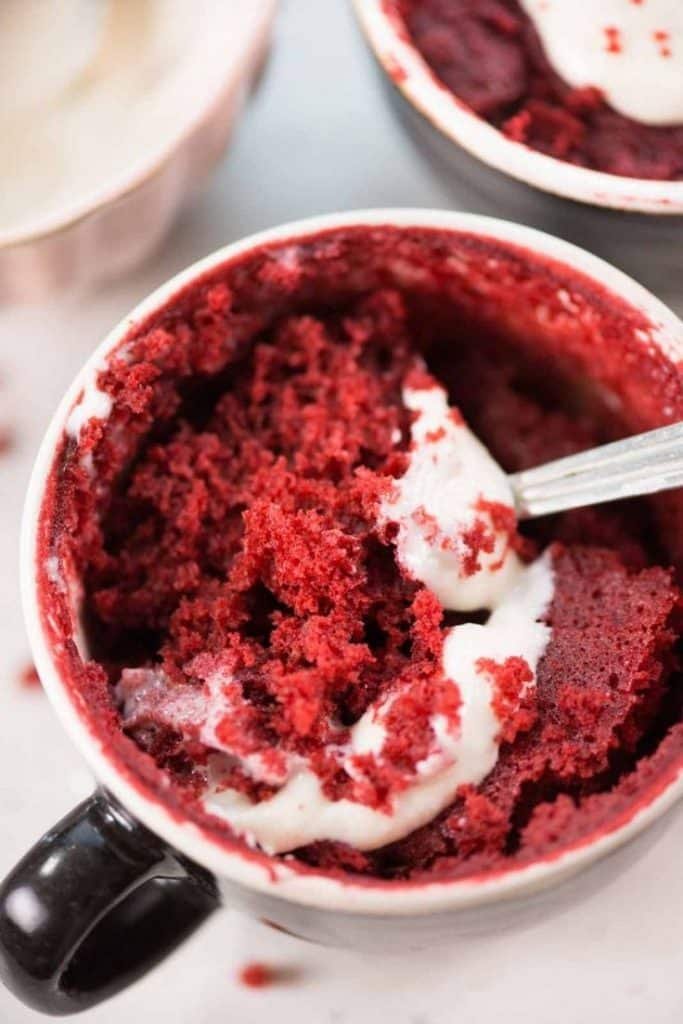
This red velvet mug cake delivers a single serving of soft, cocoa-tinted cake in about two minutes flat. Everything is stirred right in the mug, microwaved, and finished with a swirl of cream cheese frosting, so it is the perfect answer to a late-night craving. Moist, tender, and just rich enough, it scratches the red velvet itch without baking a whole cake.
Why you'll love this
- Ready in around 12 minutes, with just a couple of minutes in the microwave
- A single-serving portion mixed right in the mug, so barely any washing up
- Oil and buttermilk give a genuinely soft, moist crumb, not a dry, spongy one
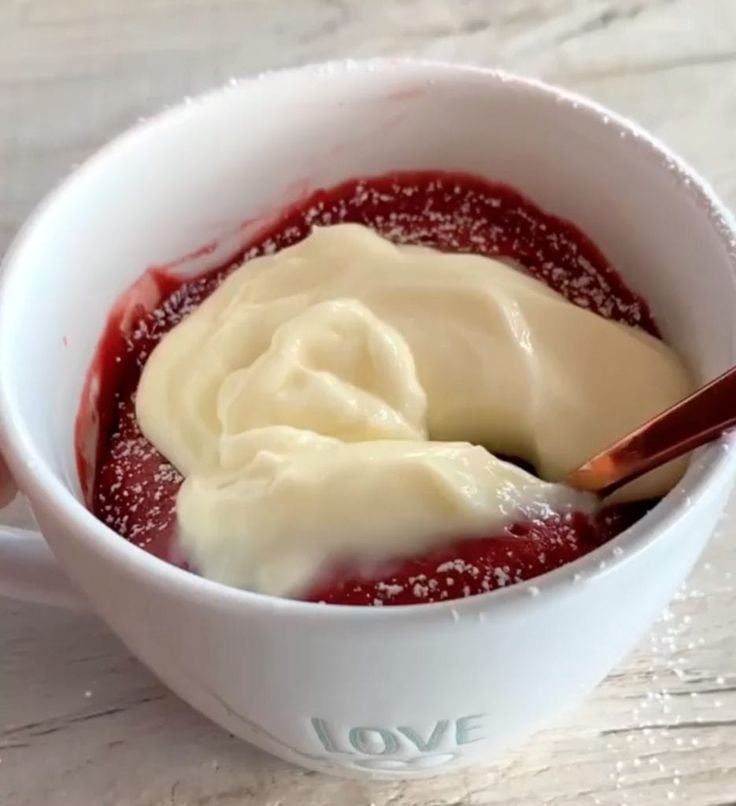
- That classic red velvet cocoa tang, finished with cream cheese frosting
Key ingredients & swaps
- All-purpose flour — the structure; spoon and level it and resist adding more, as too much flour is what turns a mug cake dry and bready
- Cocoa powder — the subtle chocolate note that defines red velvet; just a little, since classic red velvet is lightly chocolatey rather than deeply chocolate
- Buttermilk — the tang and tenderness; its acidity reacts with the leavening for a soft, moist crumb, and it is the key to that signature red velvet flavor, though milk with a drop of vinegar stands in nicely
- Vegetable oil — keeps the cake moist; oil stays liquid at room temperature and distributes evenly in the microwave, giving a more reliably moist crumb than butter in a quick mug cake
- Red food coloring — purely for that classic red velvet color; add it with the wet ingredients and stir until evenly tinted
- Baking powder — the lift that gives the cake its rise in the microwave's fast, intense heat; measure it carefully, as too much can make the cake puff up and then collapse
How to make it (step by step)
-
 1
1Choose the right mug
Use a wide, microwave-safe ceramic mug rather than a tall, narrow one, and never metal. A wider mug lets the cake cook evenly and rise without overflowing, while a tall mug cooks unevenly and can spill over.
-
 2
2Mix the dry ingredients
Stir the flour, sugar, cocoa powder, baking powder, and salt together in the mug until evenly combined, breaking up any cocoa lumps against the side.
-
 3
3Add the wet and combine
Add the oil, buttermilk, vanilla, and red food coloring, and stir well with a small spoon or fork until the batter is smooth and evenly red with no dry pockets. Stir just until smooth; overmixing develops gluten and makes the cake tough, so stop once it comes together. Fold in chocolate chips if using.
-
 4
4Microwave in short bursts
Microwave on high for about 60 to 90 seconds, starting with 60 seconds and checking before adding more in 10 to 15 second bursts. Microwaves vary a lot in power, so the first time you may need to dial the timing in.
-
 5
5Check for doneness
It is done when the top looks set and springs back to a light touch and the center is just cooked but still moist. A slightly underdone cake is far better than an overdone one; overcooking is what makes mug cakes dry and rubbery, so pull it the moment the top sets.
-
 6
6Cool, then top
Let the cake cool for a minute or two, as it keeps cooking from residual heat. Then add a swirl of cream cheese frosting or whipped cream, which softens slightly against the warm cake, and eat it straight from the mug.
Pro tips
- Do not overcook; start at 60 seconds and add time in short bursts, since even 15 extra seconds can turn the crumb dry and rubbery.
- Use a wide ceramic mug, never metal, so the cake cooks evenly and has room to rise without overflowing.
- Let it rest a minute before topping; it finishes cooking in the residual heat and firms into a softer, more even crumb.
Variations
- Make it eggless and dairy-free by sticking to oil and using plant milk with a little vinegar in place of buttermilk.
- Push the chocolate by stirring extra chocolate chips into the batter for molten pockets throughout.
- Skip the cream cheese frosting and top with whipped cream, a dusting of cocoa, or a spoonful of berries instead.
Storage & freezing
Mug cakes are best eaten fresh and warm the moment they are made; if needed you can mix the dry ingredients ahead and store them, then add the wet ingredients and microwave when the craving strikes.
Recipe
Red Velvet Mug Cake Recipe
A single-serving, quick and easy red velvet cake made in a microwave.
Ingredients
- 4 tablespoons all-purpose flour
- 3 tablespoons granulated sugar
- 2 tablespoons cocoa powder
- 1/4 teaspoon baking powder
- 1/8 teaspoon salt
- 3 tablespoons vegetable oil
- 3 tablespoons buttermilk
- 1/2 teaspoon vanilla extract
- 1/4 teaspoon red food coloring
- 1 tablespoon chocolate chips (optional, for extra richness)
- Cream cheese frosting or whipped cream for topping (optional)
Instructions
- Combine dry ingredients (flour, cocoa powder, baking powder, etc.) in a mug.
- Mix wet ingredients (milk, vinegar, oil, etc.) in a separate bowl and let it sit for a few minutes.
- Add wet ingredients to dry ingredients and mix well with a spoon.
- Add red food coloring and mix until evenly incorporated.
- Microwave on high power for 1-1.5 minutes (check for doneness at 1 minute).
- Let cool slightly before adding cream cheese frosting (optional).
Tips & notes
- Overcook the cake: Watch for a slightly dry edge and a springy center when checking for doneness. Overcooking will make it dry.
- Use a metal mug: Metal mugs can get very hot in the microwave, potentially burning you. Use a microwave-safe ceramic mug instead.
Watch how to make it
Nutrition · per serving (estimate)
Made this recipe?
Tap the stars to leave your rating — it helps other home cooks.
Frequently asked questions
Why is my mug cake rubbery or dry?
It was overcooked. Microwaves are powerful and a mug cake can overbake in seconds, so start at 60 seconds, check often, and pull it the moment the top is set and springy, leaving the center just slightly moist.
How long do I microwave a red velvet mug cake?
Usually about 60 to 90 seconds on high, but microwaves vary widely in wattage. Start with 60 seconds and add time in 10 to 15 second bursts until the top sets, rather than guessing and risking an overcooked, dry cake.
Can I make it without buttermilk?
Yes. Stir a few drops of vinegar or lemon juice into regular or plant milk and let it sit a minute to curdle. The acidity reacts with the leavening for the same tang and tender crumb that buttermilk provides.
Do I have to use red food coloring?
No, it is purely for the classic look and adds no flavor. You can leave it out for a cocoa-colored cake, or use a natural coloring such as beetroot powder if you prefer to skip artificial dye.
Why did my mug cake overflow?
The mug was too small or too full. Use a wide mug that is only filled partway, leaving plenty of headroom, since the batter puffs up considerably as it cooks in the microwave.
Can I use butter instead of oil?
You can use melted butter, but oil is preferred for mug cakes because it stays liquid and keeps the crumb reliably moist. If you use butter, melt it first and do not overcook the cake, or it can turn dry.


Leave a review