
When it comes to sumptuous treats few can rival the allure of a well-crafted cheesecake. Imagine blending the creamy richness of cheesecake with the traditional flavors of Italian tiramisù. The result is baked Tiramisu cheesecake, a dish that combines the best of both worlds. This delectable fusion is not only a culinary joy, but it also makes a statement at any party. In this essay, we’ll go over the specifics of constructing this masterpiece so you can recreate it flawlessly at home.
Baked Tiramisu Cheesecake Is a Must-Try Dessert
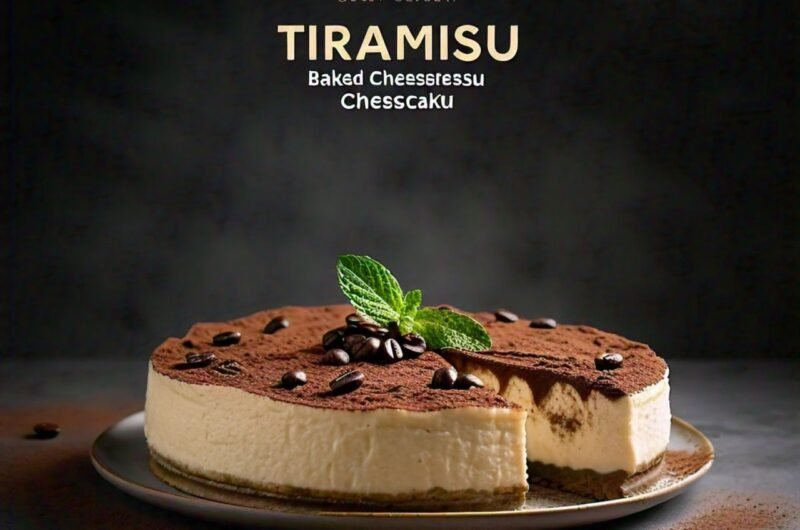
A flavour fusion
This dessert combines the finest of both worlds. The rich, creamy texture of cheesecake, mixed with the coffee-soaked ladyfingers and mascarpone topping, creates a multi-layered flavor experience.
Elegant presentation
A baked tiramisu cheesecake is both a culinary delight and a visual feast. This unique layers and cocoa powder dusting result in a visually stunning dessert that is sure to impress.
Versatile serving option
You can serve this cheesecake as a centerpiece at a dinner party or as a sumptuous treat after a family meal, making it suitable for any occasion. Its nuanced flavor profile makes it popular for informal and formal events.
Ingredients to make baked tiramisu cheesecake

- 1/2 cup Graham cracker crumbs.
- 1/4 cup granulated sugar.
- 1/2 cup melted butter
For cheesecake layer
- Use 24 oz (3 packages) of softened cream Cheese
- 1 cup granulated sugar
- 1 cup of sour cream.
- 1 teaspoon vanilla extract.
- Four large eggs
For tiramisu Layer
- use 1 cup of strong-brewed coffee, cooled.
- 1/4 cup coffee liqueur (optional).
- 24 Ladyfinger cookies.
- 1/4 cup cocoa powder for dusting.
For the mascarpone topping:
- 8 ounces of mascarpone cheese
- 1/2 cup heavy cream.
- 1/4 cup powdered sugar.
- 1 teaspoon vanilla extract.
Cooking Time: Approximately 1 hour (plus additional cooling and chilling time)
preparation Time: About 30 minutes
serving: Makes 12 servings
Nutritional facts
- Calories 450
- Fat 30gCholesterol 140mg
- Total carbohydrate: 35g
- Protein 7g
Step-by-step instructions
Preparing the Crust
Preheat the oven to 325°F. This is essential for ensuring that your crust bakes evenly.
In a medium mixing bowl, combine 1 1/2 cups Graham cracker crumbs and 1/4 cup granulated sugar. Make sure to mix to ensure an even distribution of the sugar thoroughly.
Add 1/2 cup of melted butter to the crumb mixture. Stir until the crumbs are evenly covered and have a texture similar to wet sand.
Firmly press the crumb mixture into the bottom of a 9-inch springform pan. Use the back of a spoon or the bottom of a glass.
Bake the crust in a preheated oven for ten minutes. Once finished, remove it from the oven and allow it to cool fully. This step helps set the crust and gives it a sturdy foundation.
Prepare the cheesecake layer Filling
In a large mixing bowl, combine 24 ounces of softened cream cheese and beat until smooth and creamy. Make sure there are no lumps in the cream cheese.
Gradually add 1 cup of granulated sugar to the cream cheese, beating until completely blended and creamy.
Combine 1 cup sour cream and 1 teaspoon vanilla essence in a bowl. Ensure you thoroughly combine all the ingredients and achieve a smooth batter.
Add four big eggs, one at a time, beating thoroughly after each addition. This keeps the batter smooth and prevents overmixing, which can introduce excess air and produce the cheesecake layers
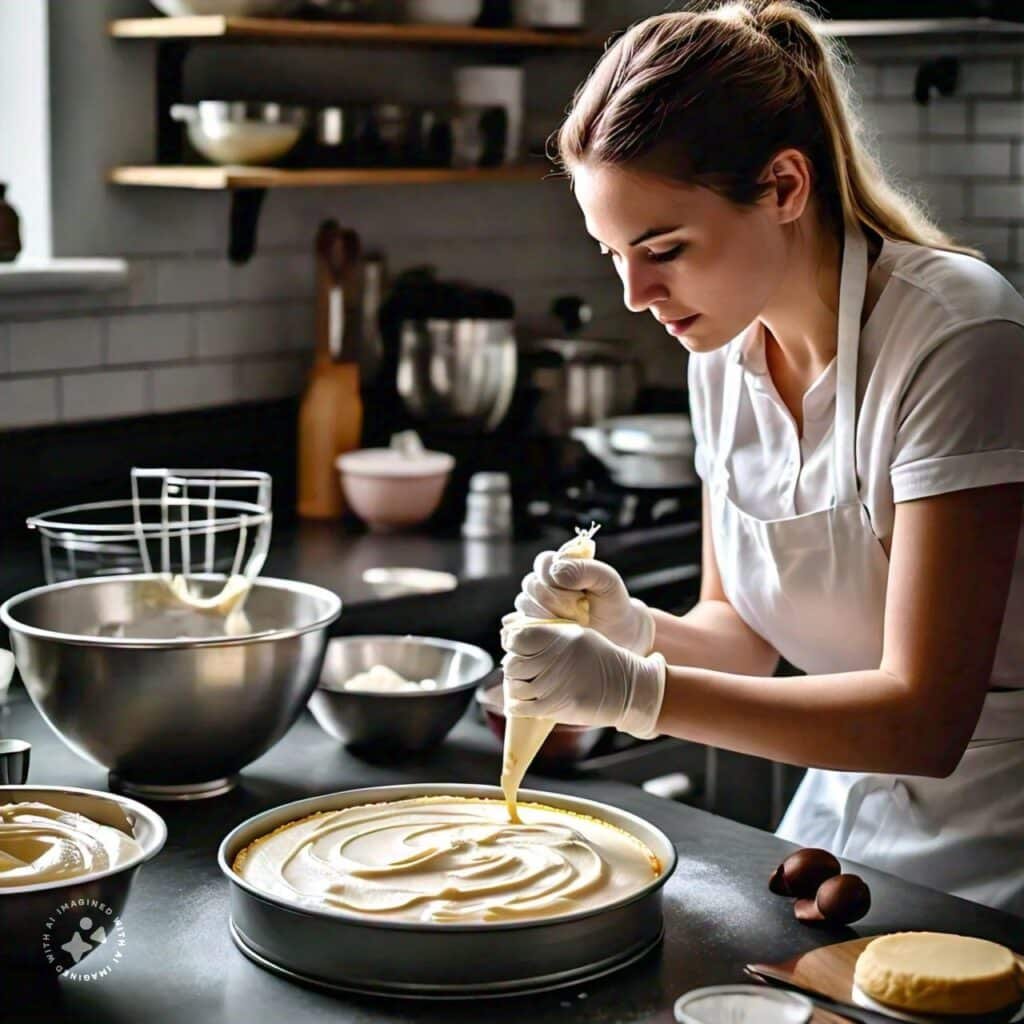
Pour half of the cheesecake filling onto the chilled crust. Spread it evenly with a spatula, until it reaches the pan’s edges.
Mix 1 cup cooled, strong-brewed coffee with 1/4 cup coffee liqueur (if using) On a shallow plate, We will use this solution to soak the ladyfingers.
Quickly dip each of the 24 ladyfinger cookies into the coffee mixture, one by one. Ensure that each cookie is moist but not soggy. Place the moistened ladyfingers in a single layer over the cheesecake filling.
Pour the remaining cheesecake batter over the ladyfingers. Spread it evenly with a spatula, covering all of the ladyfingers.
Bake the cheesecake
Put the assembled cheesecake into the preheated oven. Bake for 50–60 minutes, or until the center is firm yet slightly jiggly. Avoid opening the oven door frequently, as this may cause the cheesecake to break.
Turn off the oven and let the cheesecake sit inside with the door open for another hour. This progressive cooling prevents cracks and maintains a smooth, solid texture.
After the cheesecake has cooled to room temperature, refrigerate for at least 4 hours, ideally overnight. This allows the cheesecake to set completely and improves its flavor.
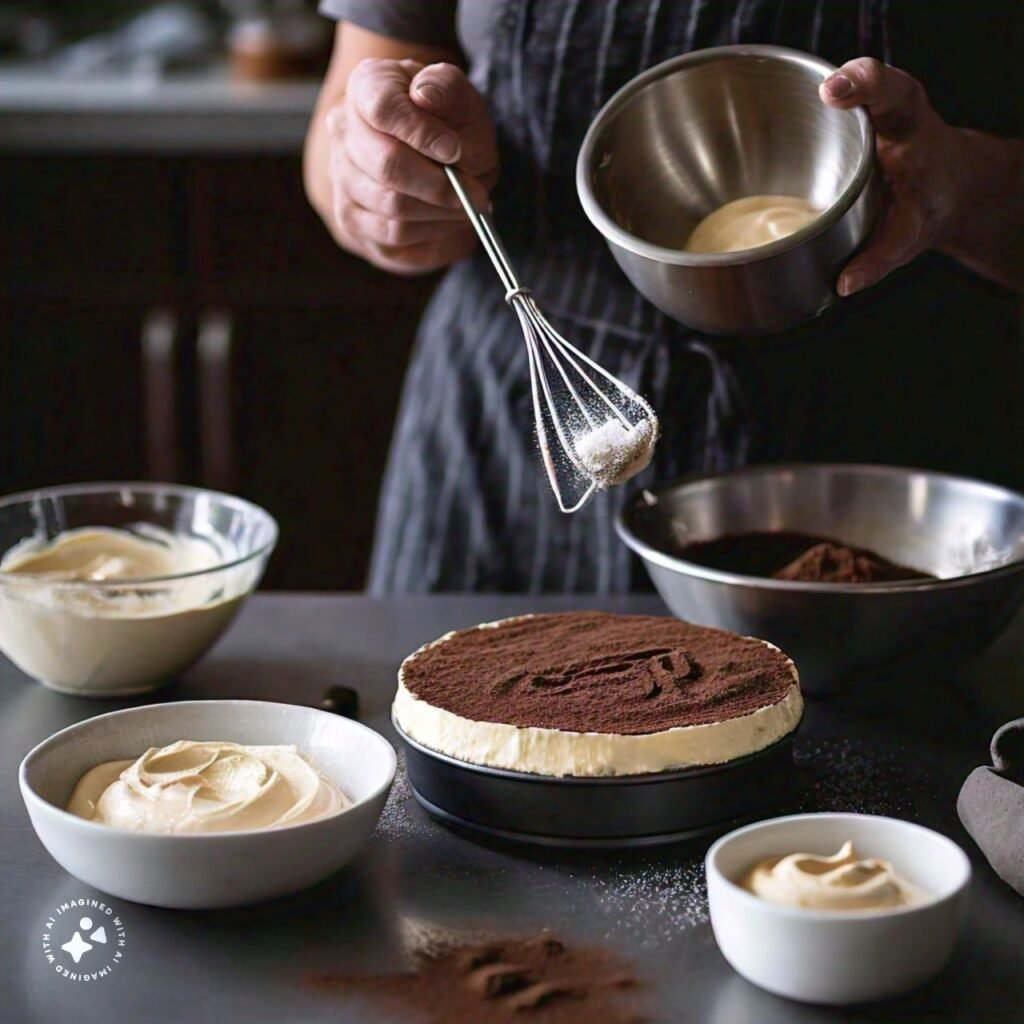
Making the mascarpone Topping
In a medium mixing bowl, combine 8 ounces of mascarpone cheese, 1/2 cup heavy cream, 1/4 cup powdered sugar, and 1 teaspoon vanilla extract.
Beat the mixture until it forms stiff peaks. The topping should be light, fluffy, and retain its shape when distributed.
Distribute the Mascarpone topping evenly over the chilled cheesecake. Use a spatula to spread a smooth, equal coating.
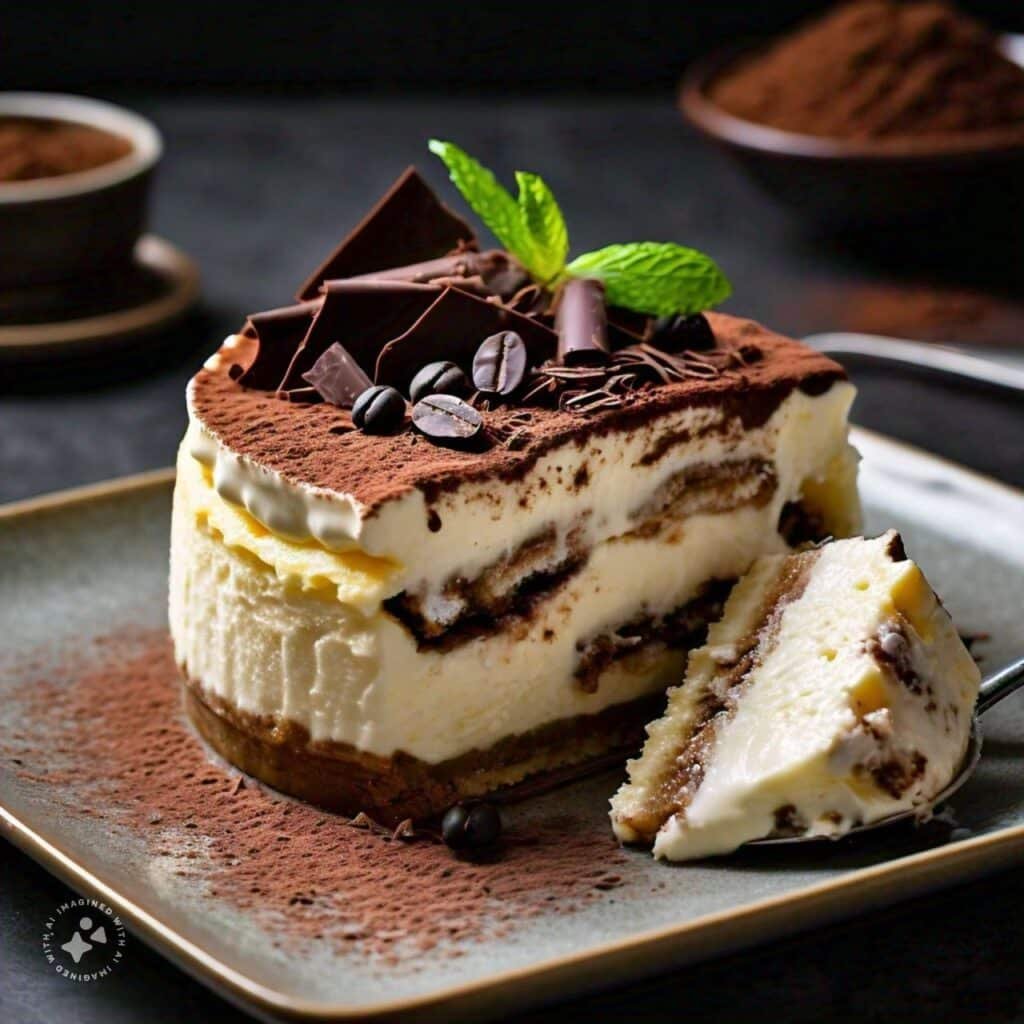
Before serving, dust the top of the cheesecake with 1/4 cup cocoa powder. This final touch improves the appearance and gives a pleasant sense of sharpness to offset the sweet, creamy layers beneath.
Serving and enjoying
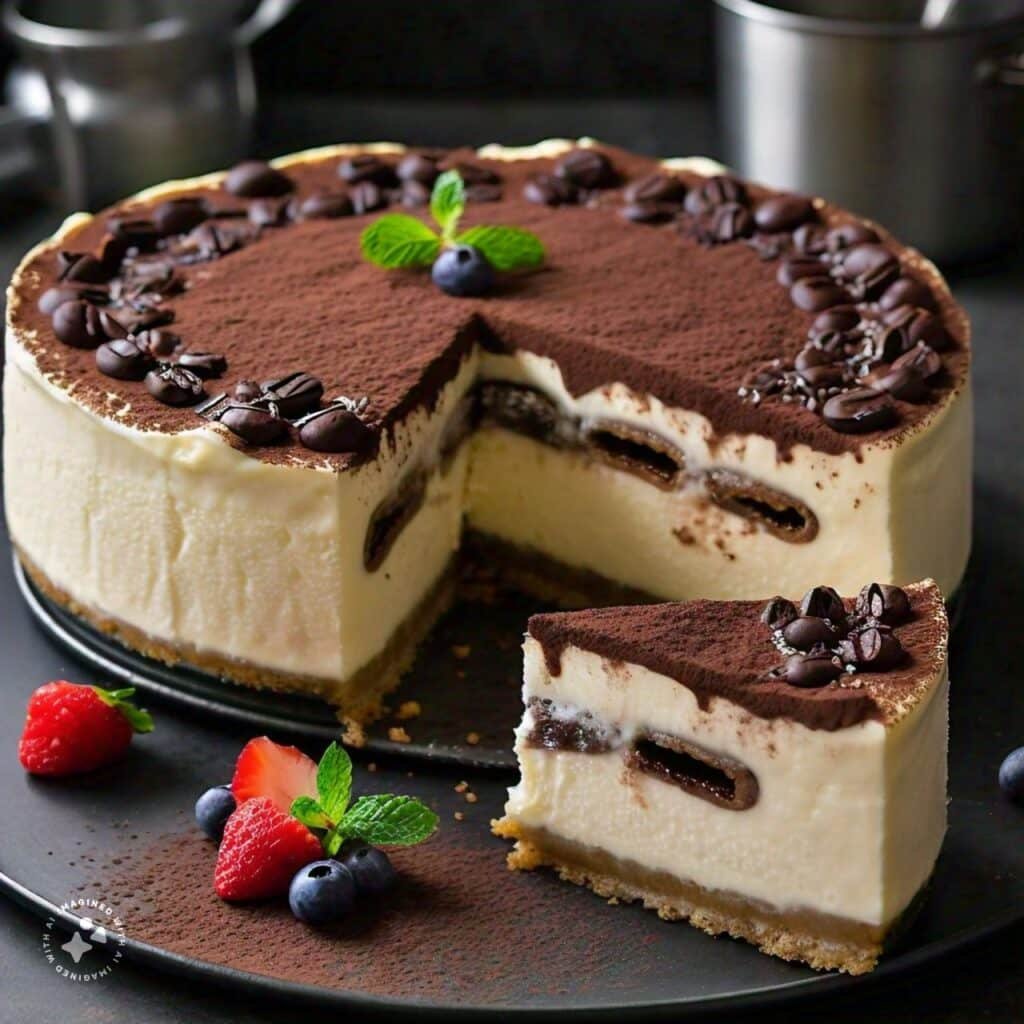
You can now serve your baked tiramisu cheesecake. To achieve the best presentation, slice it gently with a sharp knife, keeping the blade clean between slices. This cheesecake is ideal for any event, with a refined combination of flavors that will impress and leave your guests wanting more.
Pro tip
Here are some tips for making a perfectly baked Tiramisu Cheesecake.
Use high-quality ingredients
High-quality components yield the best results. Fresh cream cheese, true Italian mascarpone, and genuine vanilla essence significantly improve flavor and texture.
Do not mix the batter
Overmixing can introduce too much air into the batter, resulting in fractures. Make sure to blend and smooth out the ingredients.
Gradual cooling
Gradually cool the cheesecake in the oven and then in the refrigerator keeping the surface from splitting and creating a smooth, dense consistency.
Soak the ladyfingers thoroughly
Quickly dipping the ladyfingers into the coffee mixture keeps them wet but not soggy. Oversoaking can result in a mushy texture in the finished product.
Toppings suggestion
Top your baked tiramisu cheesecake with tasty toppings. Dust the top liberally with cocoa powder for a classic finish that balances sweetness with a hint of bitterness. For a more appealing look, sprinkle each slice with chocolate shavings or curls. Fresh berries, such as raspberries or strawberries, provide a pleasant contrast and pop of color. Sprinkle chopped nuts, such as toasted almonds or hazelnuts, to add a crisp texture. These toppings not only improve the visual attractiveness of the cheesecake but also complement its creamy, coffee-infused flavors, resulting in a remarkable dessert experience.
Variation and flavor
Experiment with different flavors to build your own baked tiramisu cheesecake. Make a chocolate variation by adding cocoa powder to the cheesecake recipe and using chocolate Graham crackers for the crust. For a fruity twist, stir raspberry or strawberry puree into the cheesecake batter and garnish with fresh berries. Add crushed nuts, such as hazelnuts or almonds, to the crust for a nutty version. Lemon or orange zest can offer a delightful citrus flavor. These variations allow you to customize the dessert to your tastes and needs.
Storing and Preserving Baked Tiramisu Cheesecake
To keep and preserve your baked tiramisu cheesecake, follow these instructions. Refrigerate the cheesecake immediately after it has cooled and set. Wrap it securely in plastic wrap or aluminum foil to keep it from drying out and absorbing fridge odors. You can refrigerate the cheesecake for up to five days. Freeze the cheesecake by wrapping it in plastic wrap and then in aluminum foil, or place it in an airtight container. Freeze for up to three months. Thaw in the refrigerator overnight for the greatest texture and flavor.
Vegan and dairy-free alternative
Make these modifications to transform Baked Tiramisu Cheesecake into a vegan and dairy-free dessert. Replace the cream cheese with vegan cream cheese made from cashews or almonds. To achieve a creamy texture, use coconut cream instead of sour cream. Rather than eggs, use silken tofu or a commercial egg replacer. For the crust, use vegan butter or coconut oil. Replace ladyfingers with vegan cookies, or prepare your own using plant-based components. For the topping, use dairy-free mascarpone prepared with cashews or soy. Replace regular sugar with organic sugar to ensure veganism. These options allow you to eat excellent cheesecake while following a vegan and dairy-free diet
Healthier ingredients for health
These substitutes will help you create a better-baked tiramisu cheesecake. Substitute low-fat cream cheese for full-fat to reduce your calorie and fat count. Greek yogurt adds more protein and fewer calories than sour cream. To boost fiber, choose whole wheat Graham crackers for the crust. Substitute coconut sugar or a natural sweetener such as Stevia for granulated sugar to cut the glycemic index. For extra fiber and nutrients, replace ladyfingers with whole-grain sponge cake. Sift the unsweetened cocoa powder to remove any sugar. These substitutes preserve the dessert’s great taste and improve its health value.
Mistake to avoid
Making a great baked tiramisu cheesecake can be difficult, but avoiding typical errors will assist. Overmixing the batter can add too much air, causing splits. Ignoring the water bath could lead to uneven baking and cracking. For a seamless blend, make sure the components are at room temperature. Dip ladyfingers quickly since over-soaking them might give them a soggy texture. Always cool gradually; not allowing enough time for cooling could cause the cheesecake to break or collapse. Finally, incorrect ingredient measurements can affect the balance of texture and taste. For optimal results, follow the recipe exactly.
Adding restaurant twist
For a restaurant-inspired variation on Baked Tiramisu Cheesecake, sprinkle each piece with espresso-infused caramel sauce. This ingredient adds a subtle touch of sweetness, nicely complementing the coffee flavors. For a more delicious finish, sprinkle finely grated dark chocolate on top. These modest but subtle tweaks elevate the cheesecake into a spectacular dessert that feels like a gourmet treat at a high-end restaurant.
Related Recipes:
FAQS
Can I prepare baked tiramisu cheesecake ahead of time?
Yes, you can prepare this cheesecake up to two days in advance. Store it in the refrigerator, securely wrapped in plastic or aluminum foil.
How can I avoid cracks in my cheesecake?
To avoid cracks, don’t overmix the mixture, bake in a water bath, and let the cheesecake cool in the oven before refrigerating.
Can I freeze the baked tiramisu cheesecake?
Yes, you can freeze cheesecake. Wrap it tightly in plastic wrap and aluminum foil, or store it in an airtight container. Freeze for up to three months, then thaw in the fridge overnight before serving.
What can you use in place of ladyfingers?
If you can’t get ladyfingers, you can make sponge cake or soft, thin cookies.
How will I know when my cheesecake is finished baking?
When the center of the cheesecake is firm but slightly jiggly, it’s ready. It will continue to solidify as it cools.
Can I make a gluten-free version of this cheesecake?
Yes, use gluten-free Graham crackers for the crust, and make sure all other components are gluten-free.
Can I use decaffeinated coffee in the tiramisu layer?
Absolutely. Decaf coffee is just as effective, providing the same flavor without the caffeine.
Final thought
Finally, the Baked Tiramisu Cheesecake is a decadent combination of creamy cheesecake and the rich taste of tiramisu. With layers of coffee-soaked ladyfingers, a rich cheesecake filling, and a delicious Mascarpone topping, this dessert is perfect for any occasion. By following our precise recipe and recommendations, you can make a dessert that not only fulfills your sweet appetite and amazes your visitors with its elegant presentation and sophisticated flavors. Enjoy every creamy, coffee-infused bite with your loved ones.
Baked Tiramisu Cheesecake Recipe
Course: Cake, DessertsCuisine: Italian14
servings30
minutes1
hour10
minutes450
kcal1
hour2
hours40
minutesThis Baked Tiramisu Cheesecake blends the creamy richness of classic cheesecake with the beloved flavors of tiramisu. Featuring layers of mascarpone cheese and espresso-soaked ladyfingers, this dessert is finished with a light dusting of cocoa powder. Perfect for special occasions, it offers a deliciously indulgent treat that’s sure to impress.
Ingredients
For the Crust:
1 ½ cups graham cracker crumbs
¼ cup granulated sugar
½ cup unsalted butter, melted
For the Cheesecake Filling:
24 oz (3 packages) cream cheese, softened
1 cup granulated sugar
1 cup mascarpone cheese, room temperature
4 large eggs, room temperature
2 tsp vanilla extract
1 cup brewed espresso, cooled
1 tbsp instant coffee granules
For the Tiramisu Layer:
12 ladyfingers
1 cup brewed espresso, cooled
2 tbsp coffee liqueur (optional)
For the Topping:
1 cup heavy whipping cream
¼ cup powdered sugar
1 tsp vanilla extract
Unsweetened cocoa powder, for dusting
Directions
- Prepare the Crust:
- Preheat your oven to 325°F (163°C).
- Mix the graham cracker crumbs and granulated sugar in a medium bowl.
- Add the melted butter and stir until combined.
- Press the mixture firmly into the bottom of a 9-inch springform pan.
- Bake for 10 minutes, then set aside to cool.
- Prepare the Cheesecake Filling:
- In a large mixing bowl, beat the softened cream cheese and granulated sugar until smooth and creamy.
- Add the mascarpone cheese and mix until fully combined.
- Add the eggs one at a time, mixing well after each addition.
- Mix in the vanilla extract, brewed espresso, and instant coffee granules until smooth.
- Assemble the Cheesecake:
- Pour half of the cheesecake filling over the cooled crust.
- Dip the ladyfingers quickly into the brewed espresso mixed with coffee liqueur (if using) and layer them over the filling.
- Pour the remaining cheesecake filling over the ladyfingers.
- Bake the Cheesecake:
- Place the springform pan in a large roasting pan and fill the roasting pan with hot water halfway up the sides of the springform pan.
- Bake in the preheated oven for 60-70 minutes, or until the center is set and the top is lightly browned.
- Turn off the oven and let the cheesecake cool in the oven with the door slightly open for 1 hour.
- Chill the Cheesecake:
- Remove the cheesecake from the oven and water bath, and let it cool to room temperature.
- Refrigerate for at least 4 hours, preferably overnight.
- Prepare the Topping:
- In a medium bowl, whip the heavy cream, powdered sugar, and vanilla extract until stiff peaks form.
- Spread the whipped cream over the chilled cheesecake.
- Serve:
- Dust the top with unsweetened cocoa powder before serving.
- Slice and enjoy!
Recipe Video
Notes
- Overmixing the Batter: Overmixing can incorporate too much air, leading to cracks in the cheesecake.
Skipping the Water Bath: The water bath helps the cheesecake bake evenly and prevents cracking.
Using Cold Ingredients: Make sure all the dairy ingredients are at room temperature for a smoother batter.
Overbaking: The center should still jiggle slightly when you turn off the oven. The cheesecake will continue to set as it cools.